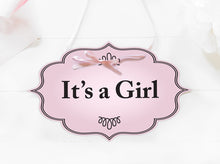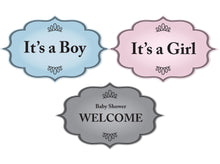
Print this simple poster to place at the entrance of your home for your baby shower celebration. And don’t forget to combine it with the rest of the ideas we present for this event.
Baby Shower Party, Baby Shower Prizes, Baby Shower Balloons, Baby Shower Themes
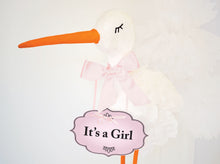
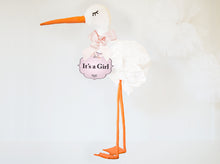
See our 3D Stork tutorial (included in this package) and hang the Baby Shower message from the 3D Stork beak.
★ This product is for personal use only. For professional purposes, please contact info@fiesta4u.com
★You can download files adapted for manual use or for cutting with your Silhouette Cameo® ★
{ WHAT'S INCLUDED }
-1 Baby Shower sign 'It´s a Girl´
You will receive all this pack in 1 ZIP including:
- 1 PDF file (1 page) to print and cut out manually or using your cutting machine Silhouette Cameo or Cricut
- 1 SVG to print and cut using your cutting machine
{ MATERIALS }
Full instructions to make your own 3D Stork and sign are included here. Additionally (materials are not provided), to make this DIY Baby Shower idea you will need:
For the sign:
- 1 A4 cardboard
- 30cm ribbon, 1cm wide
- 75cm ribbon, 2cm wide
- Hole punch
For the 3D Stork:
- Orange and white crepe paper
- 2 square blocks of polystyrene 50cm
- Knife or hot wire to cut polystyrene
- Glue gun
- Eva foam sheets (orange and black)
- 3 dry cleaning coat hangers or thick wire
- Pliers
- Wallpaper paste and water
- 1 brush
- Scissors
{ STEPS TO FOLLOW }
- For the sign: Print the message the stork will carry in its beak on A4 paper. Cut it out and make holes using the hole punch
- Pass the 30cm ribbon through the holes and tie it. Put the sign aside for later
- Stork: In a bowl, prepare the wallpaper paste mixing it with water and stirring with the brush. Let stand to increase volume
- Mould head, neck and body using the hot knife. Also shape the Stork’s beak
- Glue head and neck to the body with glue gun
- Cover head and body with white crepe paper, using the wallpaper paste. Then cut pieces of crepe paper into a large sheet and again cover the head and body with white crepe paper highlighting the detail of the feathers. Let dry
- Cover the beak with orange foam sheets and orange crepe paper using the glue gun and the wallpaper paste and let it dry
- To make stork legs; cut two long pieces of thick wire from the hanger. Cover them with foam sheets using the glue gun. Be sure to leave a free end of hanger to attach to the Stork’s body
- Cut two small pieces of wire to make the base of the legs and attach them to the rest of the legs. Cover them one by one with two pieces of orange foam sheets. Then cover the ends with crepe paper
- Cut a piece of wire to attach the beak to the head. Stick the wire to the beak at the wide part and stick it on the head. Use the hot glue gun to secure the connection
- Now you can attach the legs to the body using the glue gun to secure joints
- Cut out eyes for the Stork from black foam sheets and stick them on
- Put the wide ribbon around the Stork’s neck and make a nice bow
- Give it a final touch by hanging the printed sign from the beak
{ DIRECT DOWNLOAD }
When you finish your purchase, your file will be downloaded to your account directly and you will be able to print it as many times as you want.
baby shower games | baby shower ideas | baby shower invitations | baby shower decorations | baby shower gifts


